

First and foremost, you should always start each session with resetting to factory default the sound interface. This will prevent and solve 99% of problems.
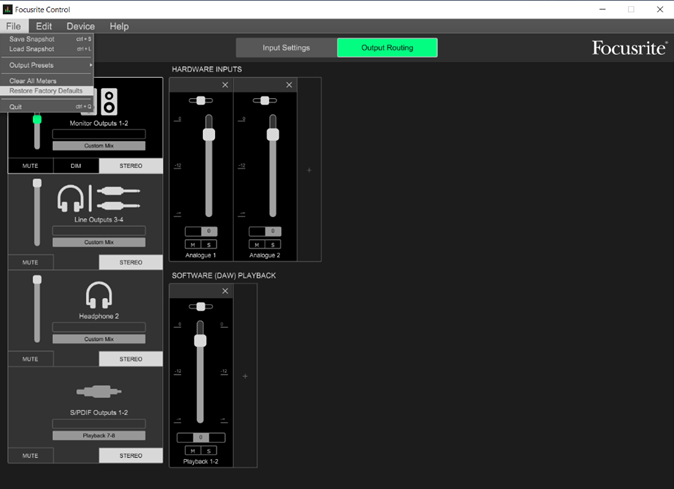
To do this, download Focusrite Control and reset the interface to its factory settings.
If this is the first time you've downloaded Focusrite Control, you may need to restart your computer for the interface to be recognized.
Start by switching the audio interface on at the back.
At the back of the audio interface, check that the Jack cables are in LINE OUTPUTS 1 and 2 only.
Use the supplied USB cable to link your laptop with the interface. Always connect the audio interface directly to your computer, without using a hub.
Confirm the USB connection by checking the front panel. If all three green lights above the monitor control are illuminated, your laptop and recording software should recognize the device as both an audio input and output source.
Now, go to your Mac/Windows audio settings and select the Focusrite USB Audio as both your Input and Output device. Do the same procedure in your recording software.